What Is a Multi Effects Pedal and How Does It Work?
A Multi-effects pedal is a compact unit that combines several guitar effects, such as distortion, delay, chorus, and reverb. Instead of connecting a row of separate pedals, a player can access many sounds from one device. Some models also include amp and speaker simulations, tuners, expression-pedal controls, and headphone outputs. The exact features vary, so the product name alone does not tell the whole story.
Inside, the guitar signal passes through electronic circuits or digital processing that shapes its tone. In a digital model, the signal is commonly converted into data, processed by a digital signal processor, then sent back as audio. The order of effects matters: distortion before delay can sound very different from delay before distortion. A preset may save those settings, letting a player recall a complete sound with one footswitch. Practical details matter, too. A bright display helps on a dim stage, while a crowded menu can slow down a quick adjustment. Not always intuitive.
This guide explains what the main sections do and how the signal moves through the unit. It also covers presets, effect chains, and common ways to connect a pedal to an amplifier or headphones. The aim is not to claim that one setup suits every guitarist. A multi-effects unit can be convenient and versatile, but its options may feel overwhelming at first. A simple starting point is often better: choose one effect, adjust it by ear, and notice what changes.
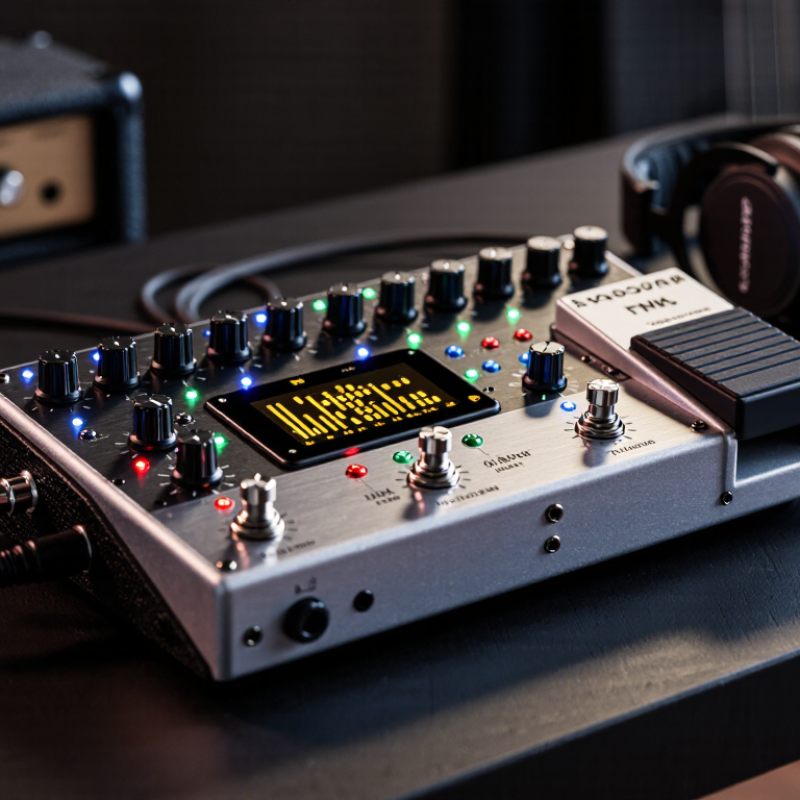
## What a Multi-Effects Pedal Combines: Drive, Modulation, Delay, and Reverb
A multi-effects pedal combines several signal processors in one unit, letting a guitarist shape a sound without connecting separate boxes. Drive adds compression and grit, from a mild edge to thick distortion. Modulation changes the signal’s pitch or timing slightly. Chorus can make a clean note feel wider, while a slow phaser creates a gentle sweep. Subtle settings often work better than turning every effect up.
Delay repeats notes after the original sound. A short repeat can add thickness; longer repeats create distinct rhythmic echoes. Reverb simulates reflections in a room or hall, placing the guitar in a sense of space. These effects interact: heavy drive can make delay repeats crowded, and generous reverb may blur fast passages. Signal order matters, too. Placing modulation before delay gives repeats that preserve the changing texture; placing it after delay affects the whole trail. Many units allow routing changes, though menus can make quick adjustments fiddly. It is tempting to build a patch with every effect active. A better test is to play a simple chord, listen for muddiness, then adjust one level at a time. One detail is easy to overlook: the room, amplifier, and playing dynamics can change how a preset feels.
What a Multi-Effects Pedal Combines
A multi-effects pedal can combine drive, modulation, delay, and reverb in one signal chain.
Example settings for one imagined preset, shown as relative effect intensity from 0 to 100. These values are illustrative, not standard settings. The effects can be adjusted individually and arranged in different orders depending on the pedal.
## Signal Flow Explained: Serial Chains and Parallel Effect Routing
A multi-effects pedal routes your instrument through several digital or analog effect blocks. In a serial chain, each block receives the previous block’s output. A compressor might feed an overdrive, followed by modulation, delay, and reverb. Order changes the sound. Put delay after distortion, and its repeats retain that saturated character. Put it before distortion, and the repeats may become distorted too. Watch the input and output levels; excessive gain between blocks can add unwanted noise or clipping. Small changes matter.
Parallel routing splits the signal into separate paths. One path can stay dry while another carries delay or reverb, then both are blended together. This can preserve the pick attack while adding a spacious tail. It also takes more care: mismatched timing or phase can thin the combined sound, especially when summed to mono. Not every pedal offers flexible routing, so check its signal-flow controls before building a preset. Try a short, bright delay beside the dry tone, then adjust the blend by ear. Listen at performance volume. The trade-off is not always neat; a parallel patch can sound wide in headphones but less clear through a single speaker.
## Inside the DSP: Common 44.1 kHz and 48 kHz Audio Sample Rates
Inside a multi-effects pedal, the digital signal processor converts your guitar’s incoming signal into numbers, processes them, then converts them back into sound. This happens thousands of times each second. At 44.1 kHz, the pedal takes 44,100 samples per second; at 48 kHz, it takes 48,000. Both rates can capture the frequencies most guitarists use.
The difference is not automatically audible. A higher sample rate can give the processor more room when shaping high frequencies, but it may also demand more processing power. It does not guarantee lower latency. Buffer size and the pedal’s internal design matter too. In practice, a tight-feeling preset often depends more on the whole signal path than on one number. That can be easy to overlook.
Tips: Check the pedal’s manual for its supported rate and whether it changes when recording or using USB. If you hear clicks or feel sluggish response, check the buffer and routing before blaming the sample rate. Compare settings at matched volume; louder often seems better, even when it is not.
## Presets and Control: MIDI Supports 16 Channels and 128 CC Values
A multi-effects pedal can store several sounds as presets, while MIDI lets another controller select or adjust them. MIDI provides 16 channels, so a pedal can listen for commands on a chosen channel. This helps separate its messages from those sent to other equipment. A preset-change message can call up a saved sound; a Control Change message can alter a parameter such as effect level or delay mix. That matters live.
The numbers need a little care. MIDI offers 128 Control Change numbers, numbered 0 through 127, and each message also carries a value from 0 through 127. A pedal’s MIDI chart explains which numbers control which functions. The same number may do different things on different devices, so checking the manual is essential. In rehearsal, a slow volume change can be easier to verify than a rapid preset jump. One awkward detail: some pedals respond only to selected commands, which can make setup feel less intuitive than expected.
Tips: Match the controller and pedal channels, then test one command at a time. Write down useful CC assignments. If a command does nothing, check the channel, number, and value range before rebuilding the whole setup. It is easy to overlook one setting.
What Is a Multi Effects Pedal and How Does It Work? — Presets and Control: MIDI Supports 16 Channels and 128 CC Values
| Control Element | MIDI Range or Format | How It Can Be Used with a Multi-Effects Pedal | Important Detail |
| MIDI channel | Channels 1–16 | Routes incoming MIDI messages to the intended device or configured control layer. | A transmitter and receiver generally need to use a compatible channel for channel messages to work as intended. |
| Control Change (CC) number | CC numbers 0–127 | Can be assigned to functions such as switching an effect block, changing a parameter, or controlling a pedal function. | Available assignments vary by device and configuration; a CC number does not have one universal pedal function. |
| Control Change value | Values 0–127 | May represent an on/off state or a position within a parameter range, depending on the receiving assignment. | For example, a device might interpret lower and higher values as off and on, but the exact behavior is configurable. |
| Program Change | Program numbers 0–127 in MIDI data | Can be used to select a stored preset on a compatible multi-effects unit. | Some interfaces display preset numbers starting at 1, even though the corresponding MIDI data starts at 0. |
| Preset selection | Typically selected with Program Change messages | Lets a player move between saved effect combinations without adjusting every effect separately. | The preset number-to-sound mapping is determined by the receiving unit’s preset organization. |
| Expression or continuous control | Often mapped to a CC number with values from 0–127 | Can provide continuous control over an assigned parameter, such as effect level or modulation depth. | The target parameter and its response curve depend on the pedal’s settings. |
| Example controller setup | Channel 1; a chosen CC number; values 0–127 | A foot controller could send a configured CC message to toggle or vary an assigned effect parameter. | Illustrative setup only: the CC assignment and behavior must match the receiving pedal’s MIDI configuration. |
| Multi-effects signal chain | Effect blocks arranged within a preset | A preset may combine effects such as distortion, modulation, delay, and reverb in a saved signal path. | MIDI controls presets or parameters; the audio signal itself passes through the pedal’s configured effects chain. |
## Connecting the Pedal: Instrument, Amplifier, and Stereo Output Paths
Connect the instrument to the pedal’s high-impedance input; this helps preserve the pickup’s brightness and dynamics. For a regular amplifier input, use the pedal’s mono output and start with instrument-level output. An effects return or powered speaker may need a stronger line-level signal. Match the setting to the destination, not just the room volume. A loud mismatch can clip; a quiet one can invite hiss.
For stereo, run the pedal’s left and right outputs to two amplifier inputs, a stereo effects return, or a recording interface. Two cables carry separate channels; one ordinary mono cable does not create stereo. The European Broadcasting Union’s R 68 recommendation uses +4 dBu as an alignment reference corresponding to −18 dBFS in digital systems. That is useful recording context, not a universal pedal setting. Real pedals vary, and their manuals matter.
Tip: Turn the amplifier down before testing connections. Raise levels slowly, then listen for harsh clipping or unexpectedly thin sound. If stereo collapses to mono, check the destination’s input routing and any phase or mono-summing controls. Small routing menus can be easy to miss; I would double-check them before blaming the pedal.
